
One of the things that you have to take care of when creating a website is to divide it into logical parts, like articles, and products, and to think of what data each part will need. For example, each article will probably require fields like:
- title
- publication date
- author
- content
- categories
while the product:
- product name
- description
- price
- product category
- quantity
When it comes to creating collections and** modeling the data**, Statamic does a great job giving us all the required tools right in the Control Panel. At the same time, with WordPress, registering custom post types and creating custom fields requires 3rd party plugins like Advanced Custom Fields or additional code.
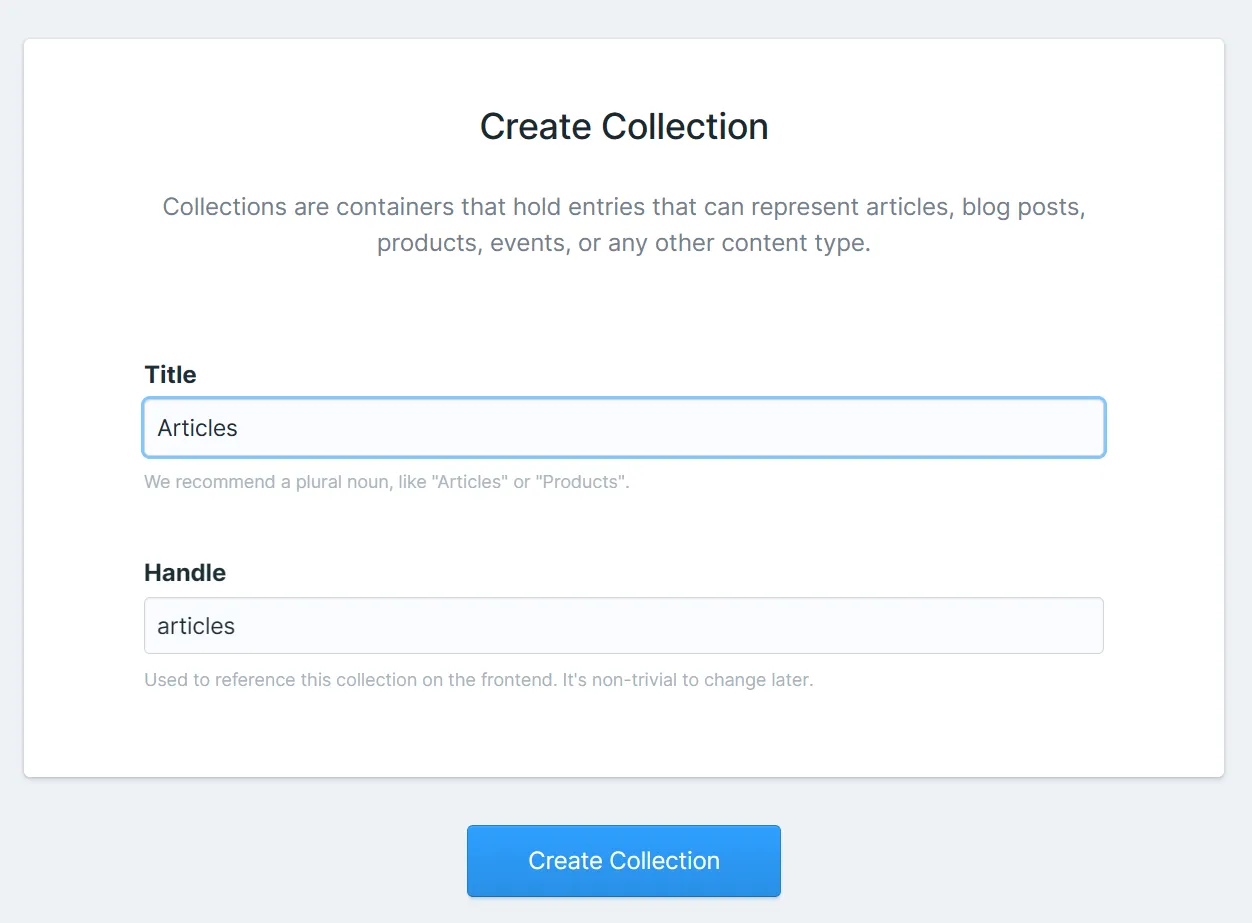
Let’s create a new Collection
After logging into the Control Panel, click Collections > Create collection. Next, just enter the name of the Collection and its handle and that’s it. You just defined an empty collection.
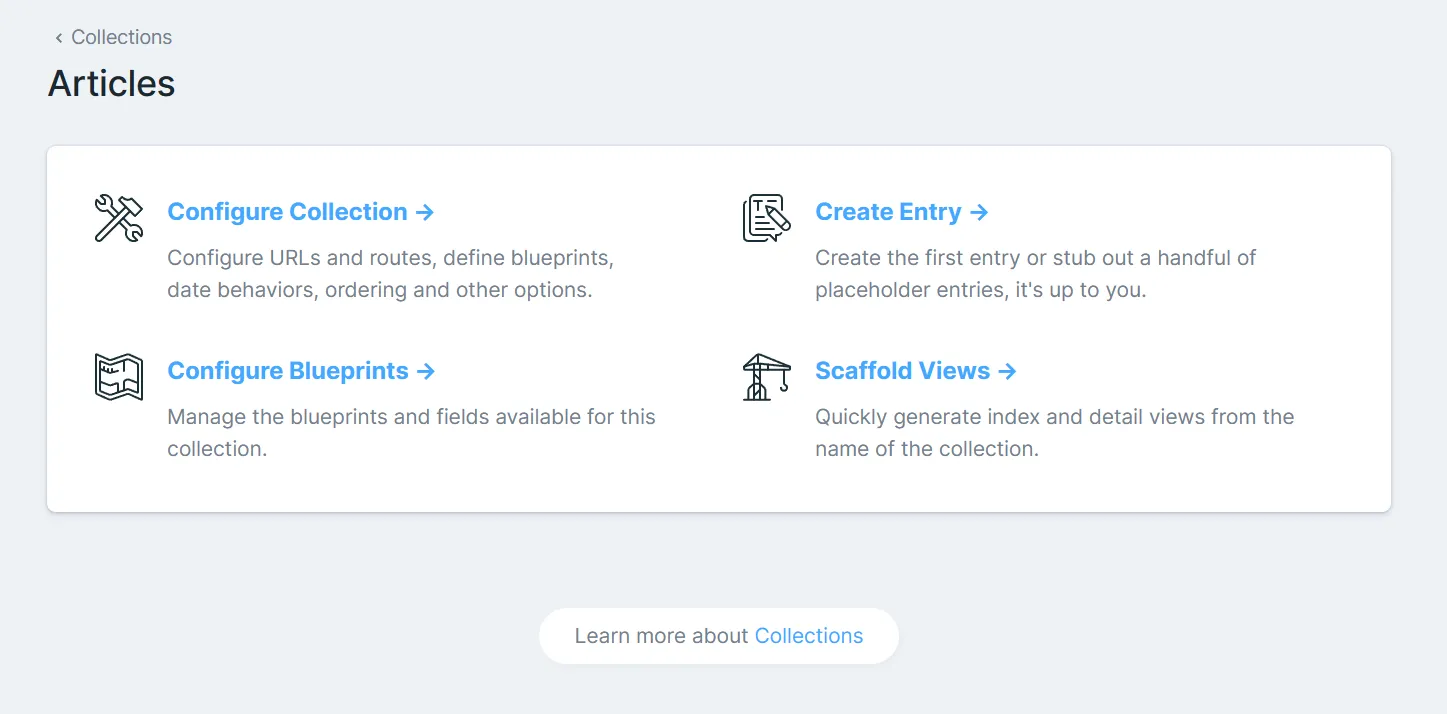
At this point, our Collection is up and running. Next, Statamic will propose to:
- configure the collection
- create an entry
- configure blueprints
- scaffold views
Data modeling
Next, you should start with configuring the blueprints. So, let’s do it by picking the** configure blueprints**. By default, one blueprint is configured, but you can create more of them(so you can have different types of posts in each collection). Now, let’s focus just on the default one.
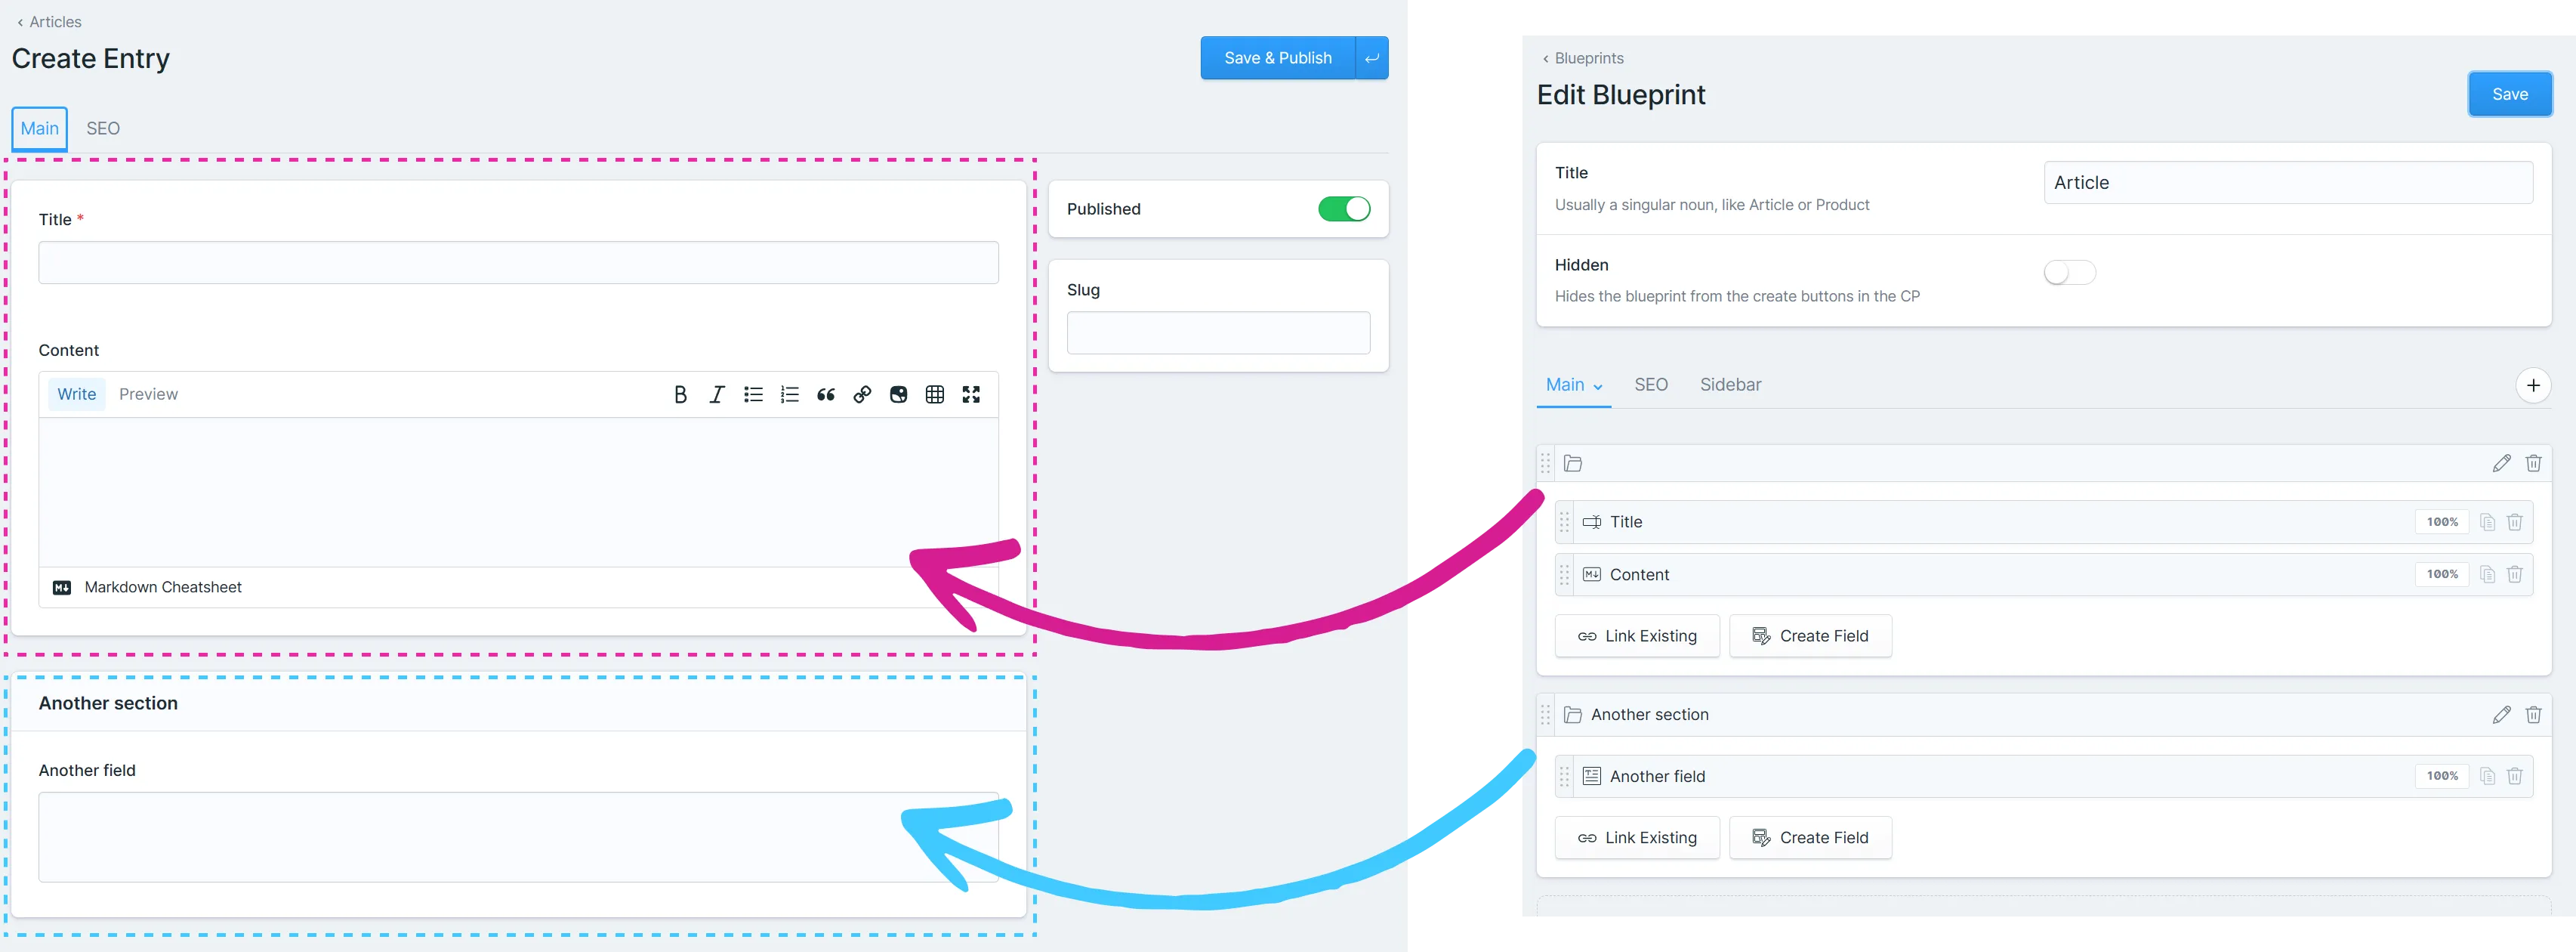
By default, the blueprint consists of the following fields:
- Title
- Content
- Slug
Let’s add a few more fields:
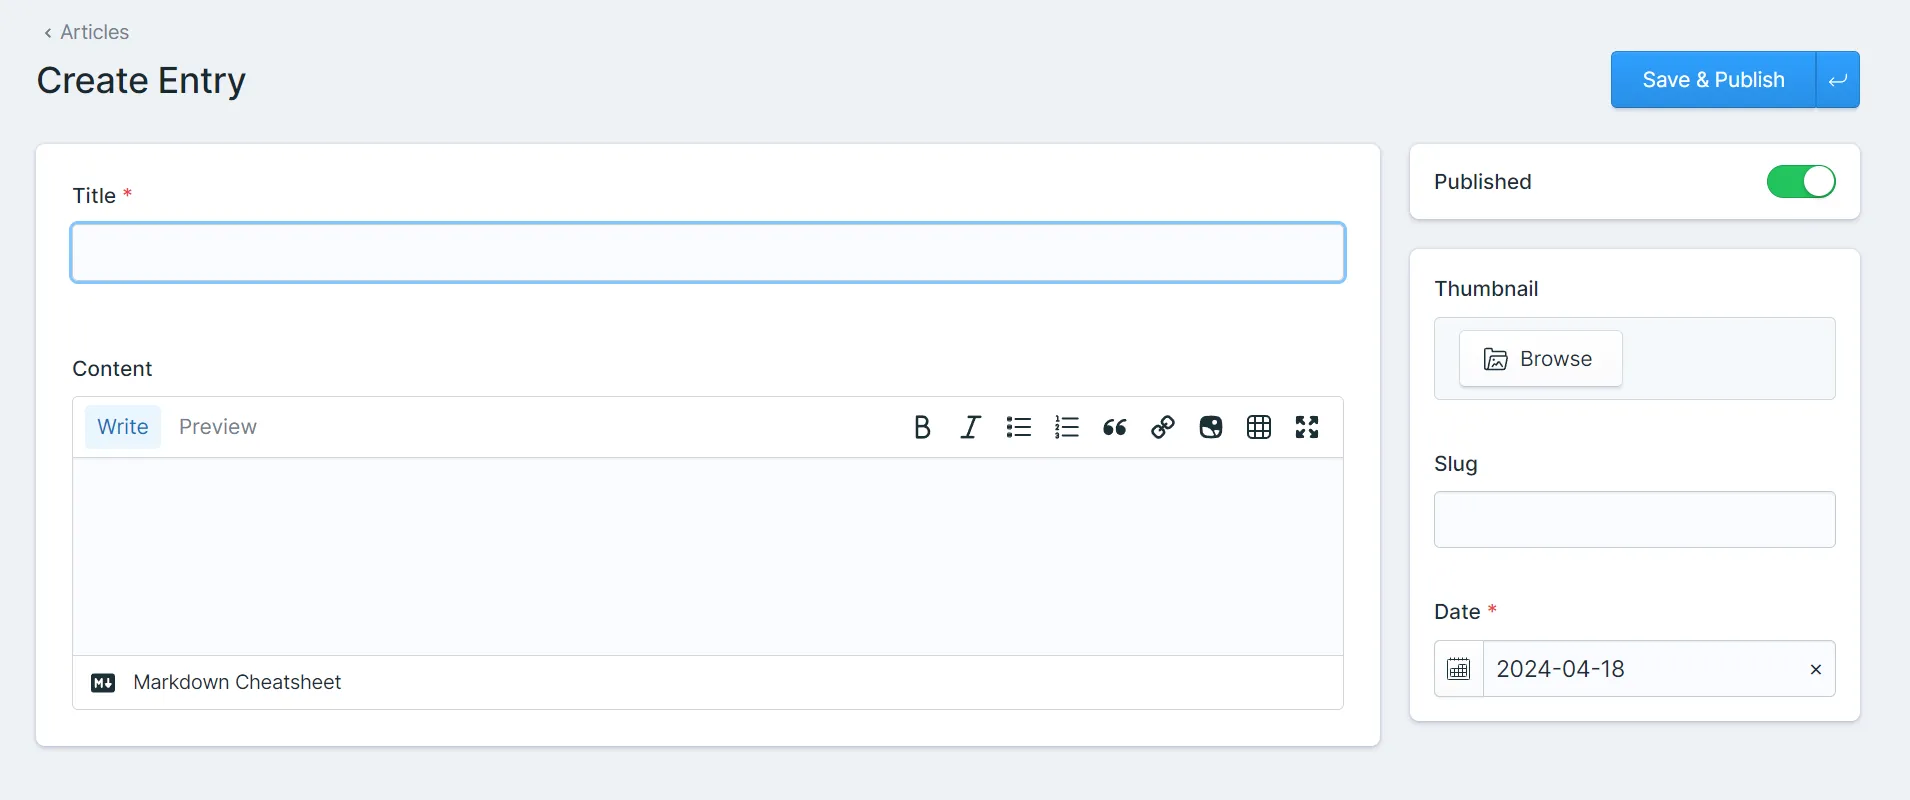
- thumbnail image
- author
If you are wondering about the published date, don’t worry - we’ll add it using the configuration later.
But before we start adding more fields - let’s dive into the layout, tabs, and sections. By default, the editor is divided into two parts - the main section and the sidebar.

If we add more sections, they will appear underneath the main one. This is a great way to organize your content in separate parts:
Apart from sections, you can also add tabs. Other than the default one, other tabs are hidden by default - you have to click on them to see what’s there. It’s great for secondary content that you don’t need all the time.
I encourage you to play around with tabs and sections to understand how they work.
The thumbnail
I like to have the thumbnail in my sidebar. So, first, select the sidebar tab and then the Create field button and pick Media > Assets.
Let’s name this field thumbnail, set max files to 1 and that’s it. We also want to make sure that the thumbnail is an image, so we have to go to the validation tab and select the image rule.
If you would like to make this field required - in validation toggle the required field.
Author
The author field should also be in the sidebar. So, again, we are selecting the sidebar tab, and creating a field.
This time we’ll use the Users field. There we can change things limiting the number of users we can select and picking the UI mode - my favorite is the Select dropdown.
More fields
I won’t go deeper into other fields, as they are mostly self-explanatory and well-documented. Compared to WordPress’ Custom Fields plugins, the biggest difference is the UI and naming of some field types. With some practice, you should quickly get used to Statamic’s way of doing things.
Configuring the Collection
It’s time to go back to the Edit Collection section. Here you’ll find a lot of useful options like:
- enabling publish dates
- enabling ordering
- setting templates
- setting routing
Overall, it’s all the things you usually define in the register_post_type function in WordPress.
Apart from the UI, you can also edit all those settings by editing the correct yaml file in the content/collections folder.
In our case, as we are creating our Articles Collection, we have to:
- enable the publish dates - that’s why we didn’t have to create a separate file for this
- set Sort Direction to descending
- set the route to
/articles/\{slug\}
Scaffolding templates
It’s time to create the template files for our Collection. Statamic doesn’t have a template hierarchy like WordPress. Until you create all the proper files, you’ll get an error. On the other hand, Statamic gives you the option to scaffold those files with one click - just Click the Scaffold views and all the required files will be created.
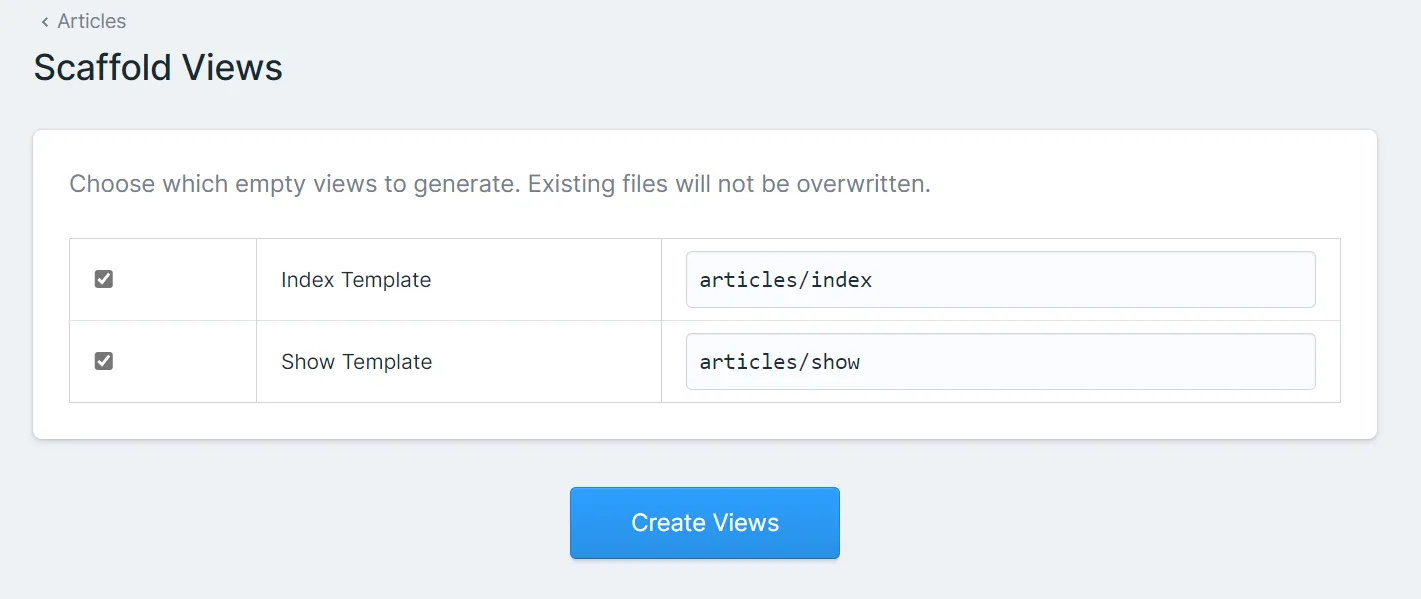
The index files is the archive and the show file is the single entry.
Scaffolding only creates empty files, which means the error will be gone, but we won’t see any content yet. Don’t worry - we’ll dive into templates soon.
There is just one problem though - while /articles/hello-world works, the /articles link for the archive throws a 404. Let’s fix this.
Creating the archive
In WordPress, we had two ways of handling the archives - you could either use the built-in archive option or create a page that was used as an archive.
The second approach is exactly what we’ll use in Statamic too.
First, in another collection (probably called Pages), we have to create a new entry called Articles. Now, we can set a template for it - we should use the articles/index one.
The last thing to do is to mount the archive - this will tell Statamic that it’s not just a page. To do so, go back to the collection configuration find the Mount option, and link to the proper page.
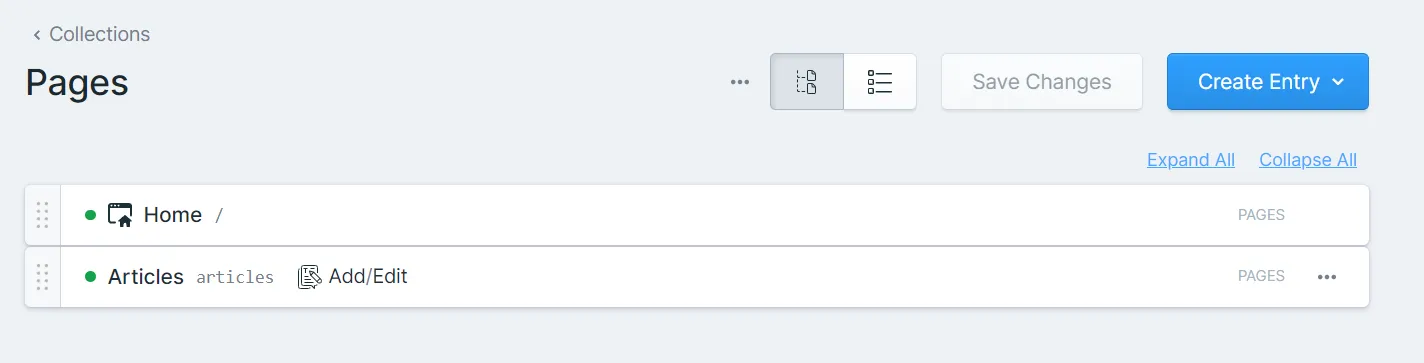
And we’re done. From now on, the archive is working correctly.
Check this quick video showing what the whole process looks like:
Time to sum up
If you ever worked with post types and custom fields in WordPress, then working with Collections and Blueprints won’t be anything new for you. There are some differences in naming and executing some things, but it’s a very similar approach.
The biggest difference is the fact that Statamic has the native UI for those instead of 3rd party plugins. You can feel that it’s a bit more natural.
Other chapters
How not to miss an article?
There are four ways:
- just visit my blog once a week and check if a new article is added (not recommended)
- write a script that will do it for you (better, but still meh)
- follow me on Twitter (quite OK, but you might still miss it)
- subscribe to my newsletter - not only you’ll get notifications about new blog posts, but you’ll also receive a cool set of weekly links (highly recommended)
Share your thoughts